Programming Sonoff WiFi light switches with ESPHome
We have three switches in my house across three levels that control the same lights on the landing area of the middle level. However, it’s difficult to find these switches in the evenings because the stairway area is dark. Additionally, we want to automate these switches in the future.
After conducting some research, we discovered the Sonoff touch switches that meet our requirements:
- gentle LED lights that illuminate in the dark
- based on the ESP platform making it possible to program them with ESPHome and easily integrate them with Home Assistant.
- WiFi connectivity
There are a couple of challenges with our three switches setup:
- One of the Sonoff switches cannot control the physical wire due to the live wire being on a different power circuit compared to the other two switches.
- Achieving synchronized LED behavior across all three switches when any one of them is flipped is necessary.
To address these issues, we propose rather simple solution: primary light switch responsible for controlling the live wire circuit to the lights. The remaining two switches will establish communication with the primary light switch through a WiFi connection. In practice, the live wires in the secondary switches will be constantly connected using an electrical connection block. The secondary switches will serve the purpose of powering up, establishing a WiFi connection, responding to user touchpad input, and relaying this information to the primary switch. No physical circuit opening or closing will be required.
The installation, programming, and automation of the above setup will be addressed in a separate post. In this post, we will focus on the steps involved in programming one Sonoff Touch light switches. This serves as a foundation for all future posts regarding Sonoff switches and light automation.
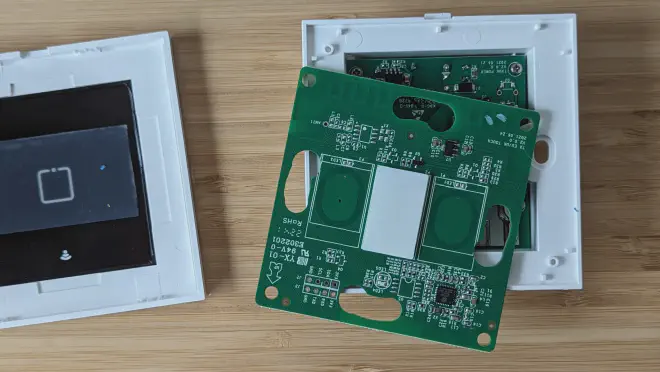
Disassembling and flashing Sonoff touch switch #
We are going to use:
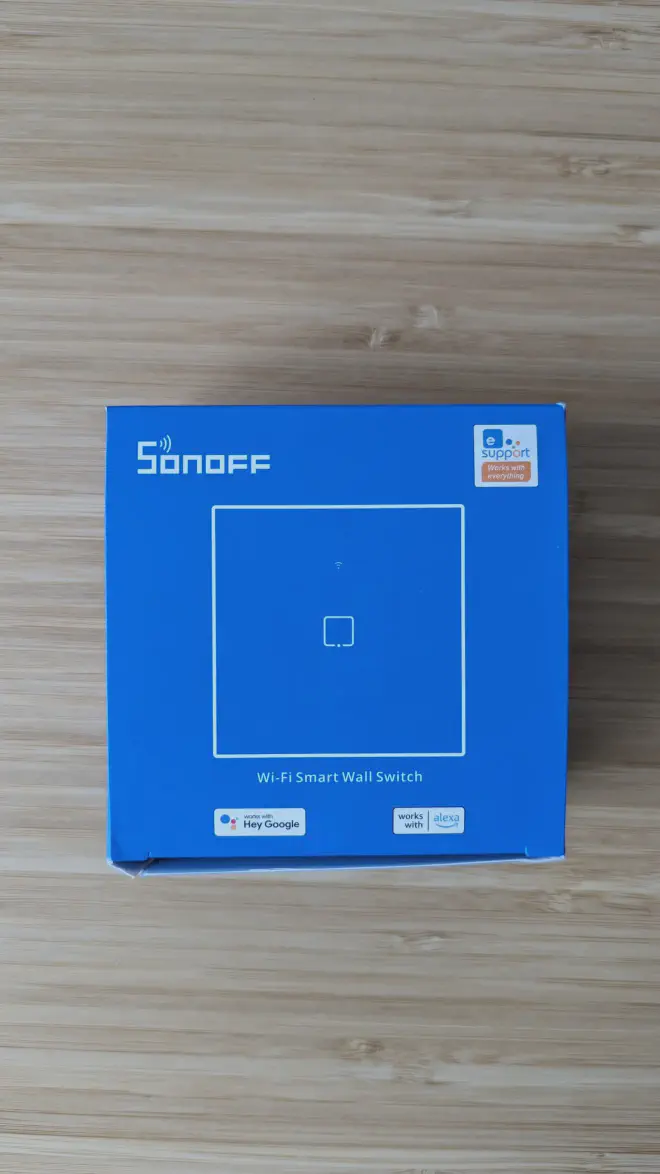
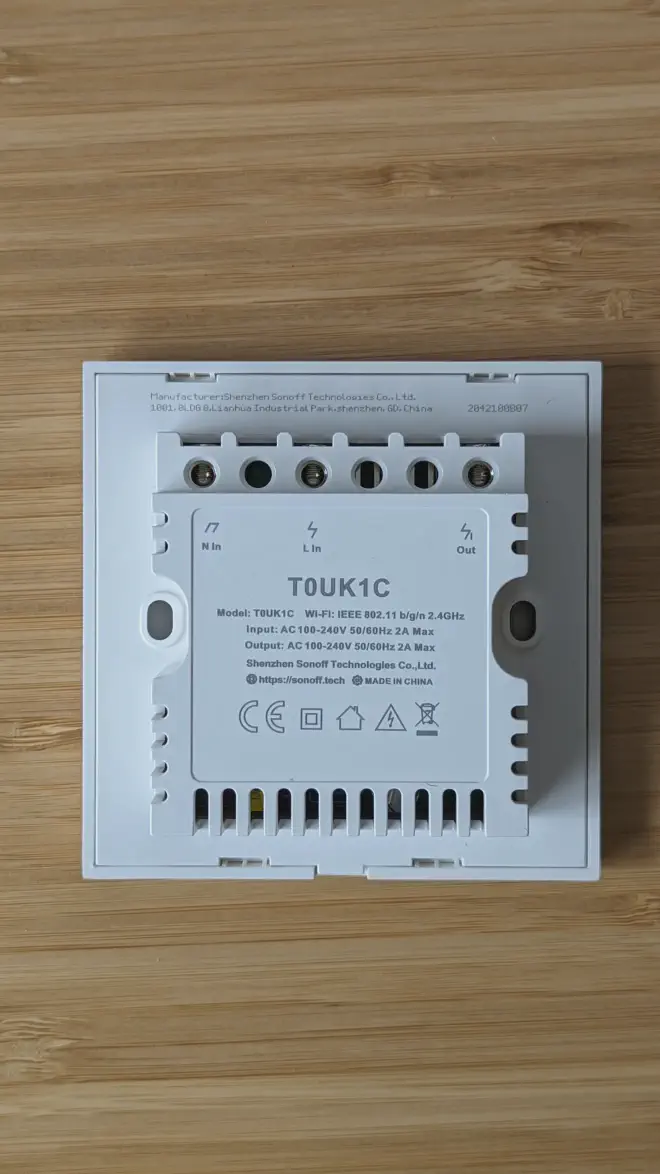
- Sonoff TO Touch (version TOUK)
- UART DSD TECH SH-U09C5 for connecting Sonoff switch to the laptop
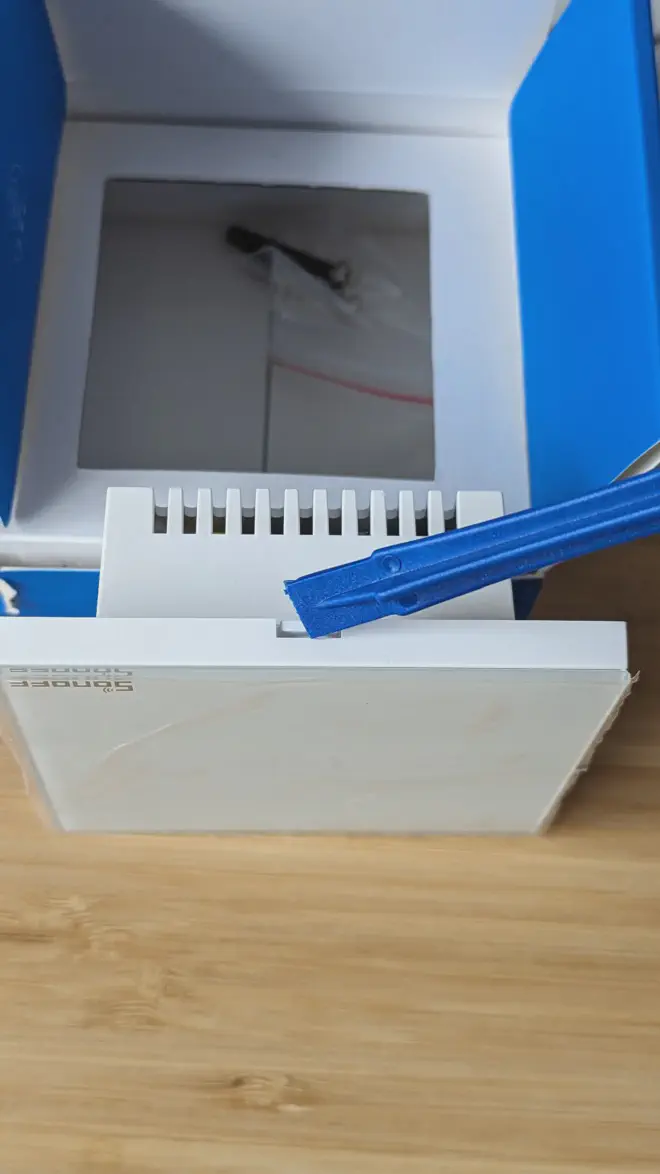
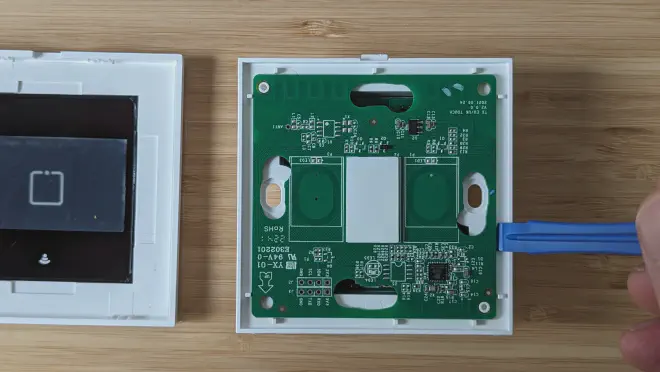
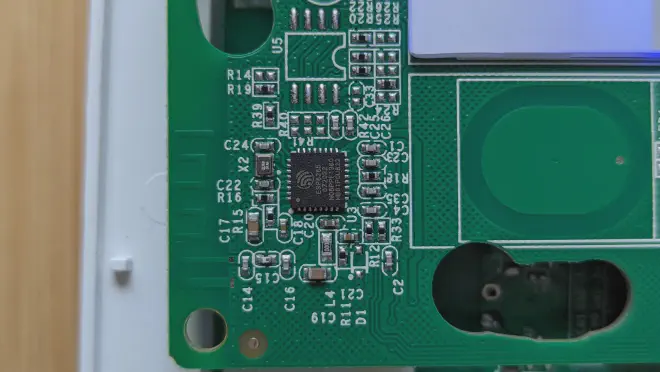
Disassebling Sonoff T0 #

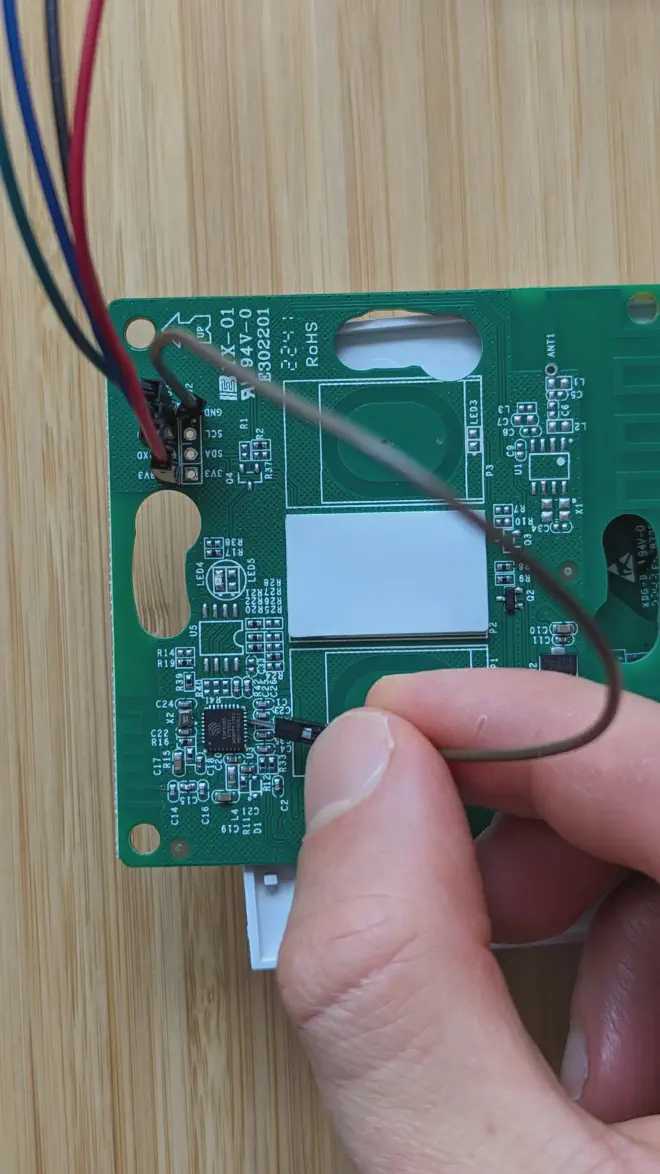
Connecting Sonoff to laptop #
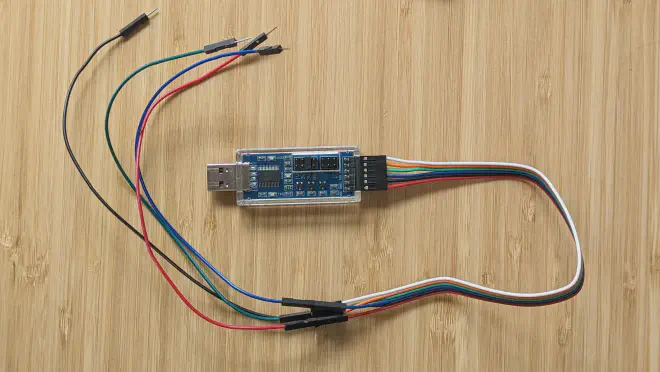
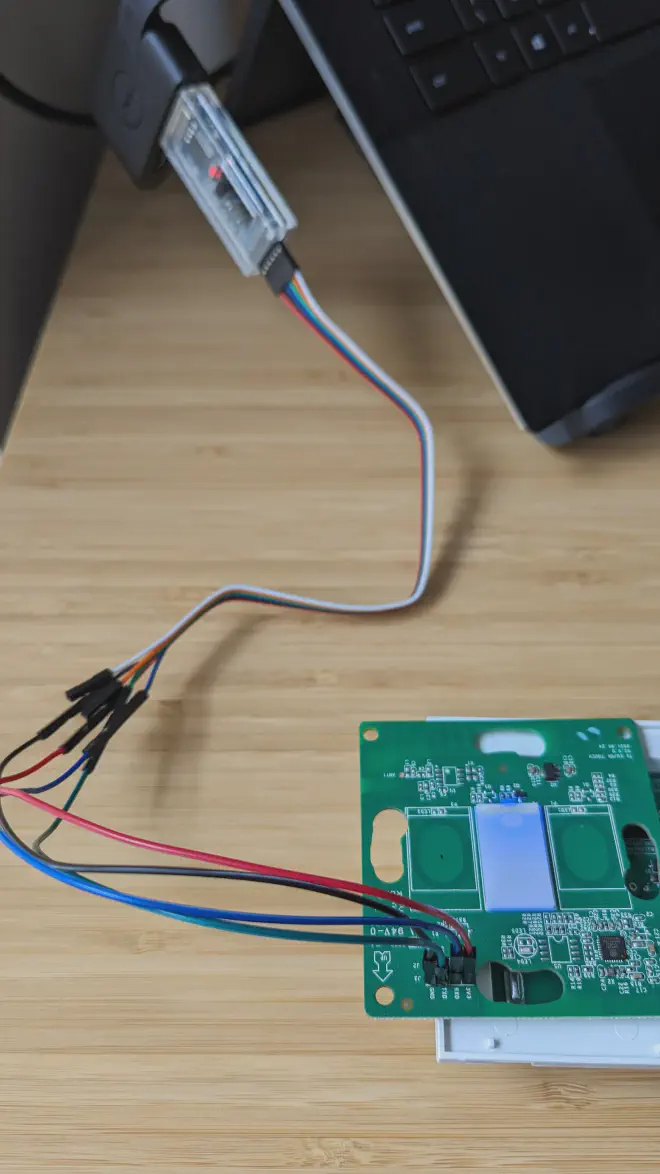
UART -> Sonoff wiring:
- GND -> GND
- TXD -> RXD
- RXD -> TXD
- VCC -> 3V3
Device should be present in the system now:
$ ls -la /dev/ttyUSB0
crw-rw---- 1 root uucp 188, 0 Feb  3 12:33 /dev/ttyUSB0
Entering flash mode #
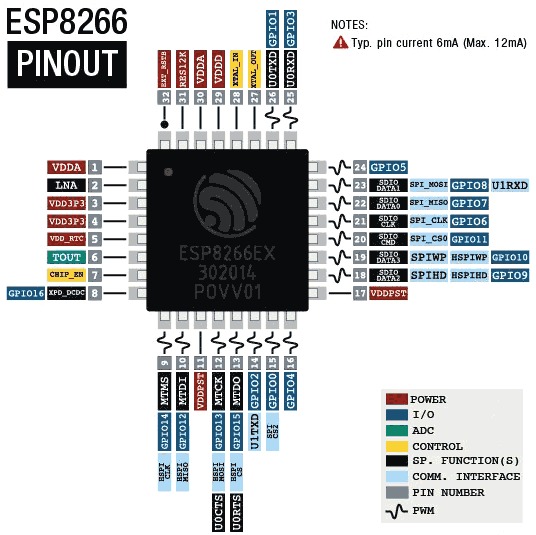
Sonoff Touch switches are based on ESP8266/ESP8285. In order to put ESP8266/ESP8285 into flash mode we need to connet GND and GPIO0 pins of the ESP8266/ESP8285 together, power microcontroller up and keep pins connected for around 10 seconds. Access to GND is easy as we have a dedicated hole for pin of a male jumper cable but GPIO0 is tricky. There are different versions of Sonoff Touch switch. The most universal approach is to use jumper male-male wire. One end connect to the dedicated GND hole and the other touch the tiny GPIO0 leg of the microcontroller. It is tricky, as I menstioned but with a bit of practice very douable.
Enter esphome docker container:
$ docker run --rm -v "${PWD}":/config --device=/dev/ttyUSB0 --entrypoint /bin/bash -it esphome/esphome
root@72d4e01e3784:/config#
Validate that the microcontroller on the Sonoff light switch is ready for flashing:
root@72d4e01e3784:/config# esptool.py --port /dev/ttyUSB0 chip_id
esptool.py v4.6.2
Serial port /dev/ttyUSB0
Connecting...
Detecting chip type... Unsupported detection protocol, switching and trying again...
Connecting...
Detecting chip type... ESP8266
Chip is ESP8285N08
Features: WiFi, Embedded Flash
Crystal is 26MHz
MAC: 48:55:19:f5:c4:9c
Stub is already running. No upload is necessary.
Chip ID: 0x00f5c49c
Hard resetting via RTS pin...
Nice! We have the switch ready to program.
Programming Sonoff T0 Touch switch #
As an example, we are going to use one Sonoff T0 gang. Here is the configuration stairways_primary_light_switch.yaml:
# stairways_primary_light_switch.yaml
esphome:
 name: stairways_primary_light_switch

esp8266:
  board: esp8285

# Enable Home Assistant API
api:
  encryption:
    key: !secret api_encryption_key

ota:
  password: !secret ota_password

wifi:
  ssid: !secret wifi_ssid
  password: !secret wifi_password

binary_sensor:
  - platform: gpio
    pin:
      number: GPIO0
      mode:
        input: true
        pullup: true
      inverted: true
    on_press:
      then:
        - light.toggle: light_1
    name: "Stairways Primary Light Button"

output:
  - platform: gpio
    pin: GPIO12
    id: relay_1

light:
  - platform: binary
    id: light_1
    output: relay_1
    name: "Stairways Primary Light"

status_led:
  pin:
    number: GPIO13
    inverted: yes

sensor:
  - platform: wifi_signal
    name: "Stairways Primary Light Wifi Signal"
    update_interval: 60s
Secrets are held in a separate file called secrets.yaml:
wifi_ssid: "my_ssid"
wifi_password: "my_wifi_strong_password"
api_encryption_key: "home_assistance_encryption_key"
ota_password: "over_the_air_password"
Compile the program:
$ docker run --rm -v "${PWD}":/config -it esphome/esphome compile stairways_primary_switch.yaml
INFO ESPHome 2023.12.9
INFO Reading configuration stairways_primary_switch.yaml...
WARNING 'stairways_primary_light_switch': Using the '_' (underscore) character in the hostname is discouraged as it can cause problems with some DHCP and local name services. For more information, see https://esphome.io/guides/faq.html#why-shouldn-t-i-use-underscores-in-my-device-name
INFO Generating C++ source...
INFO Core config or version changed, cleaning build files...
INFO Compiling app...
Processing stairways_primary_light_switch (board: esp8285; framework: arduino; platform: platformio/espressif8266@3.2.0)
...
INFO Successfully compiled program.
Compilation was successful, so let’s upload the new software to the device:
$ docker run --rm -v "${PWD}":/config -it --device=/dev/ttyUSB0 esphome/esphome upload stairways_primary_switch.yaml --device /dev/ttyUSB0
INFO ESPHome 2023.12.9
INFO Reading configuration stairways_primary_switch.yaml...
WARNING 'stairways_primary_light_switch': Using the '_' (underscore) character in the hostname is discouraged as it can cause problems with some DHCP and local name services. For more information, see https://esphome.io/guides/faq.html#why-shouldn-t-i-use-underscores-in-my-device-name
esptool.py v4.6.2
Serial port /dev/ttyUSB0
Connecting...
Chip is ESP8285N08
Features: WiFi, Embedded Flash
Crystal is 26MHz
MAC: 48:55:19:f5:c4:9c
Stub is already running. No upload is necessary.
Changing baud rate to 460800
Changed.
Configuring flash size...
Auto-detected Flash size: 1MB
Flash will be erased from 0x00000000 to 0x0006efff...
Compressed 451584 bytes to 317544...
Wrote 451584 bytes (317544 compressed) at 0x00000000 in 7.3 seconds (effective 492.1 kbit/s)...
Hash of data verified.

Leaving...
Hard resetting via RTS pin...
INFO Successfully uploaded program.
/dev/ttyUSB0 device into docker container.The device is now ready for use! Happy hacking!